Why is PH so Important

SOIL PH

Why is Checking pH Important?

Related Images:

How to Do Budding in Plants

How to Do Budding in Plants

Not used on Plumeria very often, but good info to know and maybe even give it a try.

Three Methods: Using T Budding   Trying Chip Budding   Using Patch Budding

Budding is the transfer of a bud from 1 plant to another plant. You can do budding between different cultivars of the same species, and in some cases, between different species. Unlike grafting, which attaches the entire upper part of a plant, budding only attaches the bud to a different plant. T budding works well during the summer, when the second plant is actively growing and the bark is healthy enough to peel from the trunk without breaking. Chip budding can be used instead during the spring or early fall if the second plant’s bark isn’t quite as “live.” Patch budding, meanwhile, requires simpler cuts than the other 2, making it ideal for plants with tough barks.

Method 1

Using T Budding

  1. Cut a “budstick” from its source. Search for fully matured buds growing along the original plant (often called a “scion” in budding). Prioritize branches that are still actively growing well away from the plant’s stem, on the outside of the scion’s canopy. Look for buds that appear fat and healthy where leaf stems grow from the branch. Cut the branch from the scion and then snip away any leaves from the branch. This is now your “budstick.”

    • When cutting away the leaves, make your cut at the base of the blades so that the stem is still attached to the branch.
    • Matured buds of one species of plant may look considerably different from another. Search online for images and descriptions for the particular plant that you are budding.
    • Make sure that your plant is capable of budding before you start. Some plants will only graft to particular species of plants while other plants may not graft at all.
  2. Carve a “bud shield” for grafting. Hold the bud stick so that the leaf stem is pointing away from you. Use a sharpened knife to begin your cut roughly a half-inch below the stem’s base. Slice into the bud stick toward the leaf stem. Curve your blade into the wood and then outward, in a crescent-moon motion, so that it comes out a half-inch above the stem. You should now have a small shaving of wood to graft into a new plant, the bud itself, and the leaf stem to use as a handle, all in one piece (this piece is called a “bud shield”).

    • To make sure the bud doesn’t go flying, remove the blade from the budstick just before it breaks the surface on its way out. From the outside, slice a cut a half-inch above the stem, as though crossing a “T” along the top of your original cut.
    • You also can do I-budding, where you cut a capital “I,” with one horizontal cut at each end of the vertical cut.
    • These cuts should be as smooth as possible. Rough sawing actions with your knife will prevent the wood from successfully grafting with the new plant.
     
  3. Make a T-cut in the new plant. Choose a smooth spot on the stem of the new plant (called a “root stock”) to graft your bud to. Make the vertical cut first, from top to bottom, along the stem. Keep it to the same size as the length of your bud shield. Then make a horizontal cut along the top to form your “T.”

    • Alternately, you can make your horizontal cut along the bottom of the vertical cut. This will allow excess water or sap to drain from the root stock more efficiently.
     
  4. Create a pocket. Peel the bark away from your T-cut. Start from the inside corners where the vertical and horizontal cuts meet. Peel outward until a triangle of the plant’s tissue is exposed. Stop here, without tearing the peeled bark off the stem.

    • If the bark resists peeling, this may be a sign that the root stock has not fully recovered from its winter dormancy. Wait until its dormant cycle is completely over before grafting. Usually this is during the height of summer.
     
  5. Trim the bud shield if needed. Hold the bud shield by its leaf stem. Line it up with the vertical cut in the root stock. Place the bud shield’s wood shaving against the root stock’s exposed tissue. If the top of the wood shaving is higher than the root stock’s horizontal cut, cut off the extra wood so that it doesn’t stick out.
     
  6. Graft the bud shield to the root stock. Once the bud shield lines up perfectly with the root stock’s vertical cut, line the two up. Smooth the two flaps of peeled bark over the bud shield to cover it. Wind grafting tape around and around the root stock to seal the graft, leaving only the bud shield’s leaf stem and bud exposed. Let the plant heal for two to three weeks, then remove the grafting tape. Trim the root stock above the bud shield to motivate growth from the scion bud

    • If it is too late in the season to expect growth immediately, wait until winter to trim the top of the root stock.
    • Budding rubbers, which break down naturally, can be used instead of grafting tape.

Method 2

Trying Chip Budding

  1. Remove a budstick from the scion plant. Search for fully matured buds on branches that are still actively growing on the outside of the original plant’s canopy. Look for buds that appear fat and healthy in the crooks where leaf stems grow from the branches. Cut the branch from the original plant (or “scion”) and then snip the leaf blades from their stem. The cut branch is now your “budstick.”

    • Do not cut the leaf stem from the branch. This way you will be able to hold your eventual “chip” without disturbing the bud itself.
    • Matured buds of one species of plant may look considerably different from another. Search online for images and descriptions for the particular plant that you are budding.
     
  2. Make your cuts. Position your blade horizontally along the budstick, about a half-inch below the bud and leaf stem. Slice downward into the budstick at an angle of roughly 50 degrees. Make your cut an eighth of an inch deep. Perform your second cut by placing your knife about three-quarters of an inch above your first cut, with the bud and leaf stem between the two. Position it horizontally along the branch. Slice downward into the wood, angling the blade so that it connects with your first cut. Once the cut is made, pluck the chip out of the scion by its leaf stem.

    • You may need to vary the depth and length between the two cuts according to the size of your plant and its buds.
     
  3. Carve a pocket in the root stock. Choose a smooth area on the stem of the plant receiving the transplant (called a “root stock”). Perform the same cutting technique here to create a pocket to receive your chip. Try to make it as identical as possible in size and shape to your chip so that one fits into the other perfectly.

    • Because you do not need to peel live bark to make your pocket, this technique can be used before and after summer, unlike T-budding.
     
  4. Graft your chip. Insert the chip into the root stock’s pocket. Wind grafting tape around the graft. Cover the bud and stem as well as the whole graft. Seal it tightly to prevent loss of moisture, which is a greater risk with chip budding than it is with T-budding. Let the plant heal for two to three weeks, then remove the grafting tape. Trim the root stock above the chip to motivate growth from the scion bud.

    • If the chip is smaller than the pocket, line up as many sides of the chips as possible with the corresponding edges of the pocket.
    • If it is too late in the season to expect growth immediately, wait until winter to trim the top of the root stock.
     

Method 3

Using Patch Budding

  1. Cut a budstick from a scion plant. Look along branches that are actively growing on the outside of the original plant’s canopy. Search for fully matured buds where the leaf stems meet the branches. Cut the branch from the original plant (called a “scion”). Then cut the leaves from the very top of their stems. What you have left is a “budstick.”

    • Snipping the leaf’s blades away and leaving the stem creates a handle to hold your eventual “patch.”
    • Matured buds of one species of plant may look considerably different from another. Search online for images and descriptions for the particular plant that you are budding. 
  2. Cut out your patches. First, make a horizontal slice along the budstick, about a half-inch above the bud and leaf stem. Then make a second, parallel slice of equal length about a half-inch below the bud. Perform a third, vertical slice from the end of one horizontal cut to the corresponding end of the other. Then make a second vertical slice to connect the other two ends of the horizontal lines. Now carefully peel the rectangle of bark from the branch.

    • Next, find a smooth stretch along the stem of the “root stock” (the plant that will receive the scion patch). Use the same cutting technique to remove a rectangular patch of equal size.
    • You can also try the I-budding method, which is very similar. You make the same types of cuts, but the first cut is vertical instead of horizontal. Cut one vertical line and two horizontal lines (one at each end of the vertical line). The finished cut will look like a capital “I.”
  3. Graft and wrap your patch. Place the scion patch into the root stock’s open patch. Line the sides of each one up so they are flush. Wind grafting tape around the patch to seal it, leaving the bud and leaf stem exposed, or use budding rubber to secure the patches. Let the plant heal for two to three weeks. If you used grafting tape, remove it, since it doesn’t break down naturally like budding rubbers do. Trim the root stock above the patch to motivate growth from the scion bud.

    • If it is too late in the season to expect growth immediately, wait until winter to trim the top of the root stock.
 Tips
  • T-budding is often used for plants, such as roses, since the stem’s bark is easier to peel than a tree’s.
  • Trees that T-budding is most often used for include fruit trees such as apples, peaches, and pears.
  • Chip budding is more commonly used with trees.
  • Patch budding is best suited for trees with especially tough bark.
  • Any handy sharp knife will suffice for cutting, but budding knives are specifically designed with curve at its tip to make the job easier.
  • In general, it is safest to make a cut with the sharp end of the blade facing away from you whenever possible.
  • Grafting tape, budding knives, and budding rubbers can be purchased online or at garden-supply stores.
 

Things You’ll Need

  • Sharp knife
  • Grafting tape or budding rubbers
  • Scion plant
  • Root stock plant

Related Images:

How to Grow Plumeria Cuttings Guide

Propagation by cuttings is the most commonly used method to propagate plumeria, a cutting will produce an exact clone of the parent plant. Normally plumeria cuttings are quite easy to root if done in the Spring and Summer. All plumeria cuttings will root under perfect conditions, some take longer than others. Do your research so you are aware of the hard to root cultivars. Some hybrid plumeria can be more difficult to root. 

The most common mistakes are over watering and trying to root late in the growing season. For difficult to root plumeria cuttings you can use a grow or heat mat placed under the pots to encourage new root growth. Plumeria roots grow best when the root zone temperature is between 75 and 85 degrees.

The fertility status of the donor plant can influence rooting. Avoid taking cuttings from plants that show symptoms of mineral nutrient deficiency. Conversely, plants that have been fertilized heavily, particularly with nitrogen, may not root well. The stock plant should not be under moisture stress. Cuttings from lateral shoots often root better than cuttings from terminal shoots.

There are many good methods developed for starting cuttings. You can find some good articles on cuttings with various methods on Plumeria.Care. Which one works best for you will depend on the time of year and your climate.

Rooting Plumeria Cuttings in Soil

Below is a guide to start your plumeria from cuttings. What are Plumeria Cuttings, Rooted Plumeria and Grafted Plumeria.

  • When to take cuttings? Although you will eventually wind up with broken branches at different times of the year, the time of the year is important to your cutting survival chances. Different regions have different length of growing season. 
    • Spring is the best time to start plumeria cuttings, when the are waking up from dormancy.
    • Early to Mid Summer is also good time. Late summer is ok. The later you start a cutting the less chance you have to correct problems you may have.
    • Early Fall or later does not give your cutting a chance to put on a good root system to survive the first winter unless you extended the growing season with lights and bottom heat.
  • When taking cuttings it is important to decide the reason you are taking the cuttings.
    • Will you root the cutting yourself?
    • Will you graft the cutting?
  • Preparing the donor Plumeria tree for taking cuttings
    • Selecting a healthy tree with no visible signs of stress is important, the healthier the donor tree, the better survival chances your cutting will have.
    • Watering the donor tree the night before will provide extra hydration to the cutting.
    • Remove the leaves by cutting the leaf stem about 1/2″ from the branch before or right after you take the cutting. Leaves left on cuttings will cause the loss of valuable moisture. Breaking the leaves off can damage the cutting and allow disease to enter at the damaged leaf nodes.
    • If taking the cutting for rooting remove any inflorescence, they could prevent the cutting from rooting. 
  • Take cuttings from plumeria using clean tools. You can use garden shears, a sharp knife or saw with fine teeth.
    • Clean your cutting tools between taking cuttings from each tree or even more often.
    • Do not cut bad branches off when taking cuttings.
    • Select a branch from the last growing season that is light gray for best results.
    • For rooting, cuttings should be 12″ or longer. Larger cuttings have a better chance of rooting, but I’ve noticed that very large branches take longer to root.
    • For grafting, cuttings should be 8″ to 12″ long. Large cuttings are more difficult to handle and slip more easily. Finding the right root stock can be a problem for large diameter cuttings. 
  • Right after you make the cuttings.
    • For rooting, dip in a rooting hormone, the longer you wait the less benefit it will have.
    • For grafting no need to dip in a rooting hormone.
  • Allow the cuttings to Callus. Roots will not form until the cutting has formed callus.
    • Place in a warm dry place out of direct sun.
    • Allow plenty of air circulation.
    • Check the cut ends often to be sure they are not getting soft. If you find any getting soft, you should cut until you see good white wood.
    • Allow the cuttings to dry until the cut end is hard, usually from 1 week in warm climates to 2 weeks or longer in cooler climates.
    • Cuttings can be stored for weeks or even months, depending on the cultivar. The sooner they are planted after properly callused, the better they will do.
  • Potting soil mix preparation
    • Use a mixture of 1 parts Perlite to 1 part potting mix without fertilizer. The key is to have a well draining mix.
    • Moisten the potting mixture until it holds together but is not dripping water.
  • Fill a rooting tube or 1 gal pot (larger if needed for big cuttings) with lots of drain holes with the potting mix. 
    • Use one pot for each cutting
    • Or one rooting tube for each cutting
    • If using rooting tubes, place a cotton ball in the bottom so you will not lose soil.
    • You can use a large pot and place several in 1 pot. This is called gang rooting. It works well, but can cause damage to the roots when transplanting.
  • Make a hole 3″ to 5” deep deep and a little bigger than the diameter of your cuttings in the center of each pot.
    • Use your finger or the handle of a trowel.
    • Insert the cutting in the hole.
    • Gently firm the soil around the cutting.
    • It is a good idea to use bamboo stakes to keep the cutting from moving. The slightest movement for wind or animals could break the newly formed roots.
  • Watering you newly planted cutting
    • Water the pot or rooting tube well ONCE with a mix of Vitazyme and Carl Pool’s Root Activator and do not water again until you see 3 or 4 full leaves.
    • Add more soil if needed.
    • Check the cuttings every week.
    • If the cutting seems to get dehydrated or shows wrinkles, then you should lightly mist every day until the wrinkles are gone or at least minimized (NOT WATER)
    • Watering a rooting cutting to much will cause rot.
  • Place your potted cutting in a warm location and move to full sun after a week or so of exposing it to more sun each day.
  • When your cutting has 3 to 4 full sized leaves your cutting typically will have roots. The more the leaves the more roots.
    • Depending on your location and weather, cutting will form good roots in about 45 days.
    • The reds are usually harder to root.
  • Fertilizing by misting the new leaves is a good idea. Use 1/2 strength for first time and spray early or late in the day, but not in full sun.
  • Transplanting
    • Your cutting can stay in a 1 gal pot for many months. You can transplant to a larger pot when you see roots coming out of the pot.
    • If in a Rooting tube, you should transplant when you see 4-6 leaves to a pot.
    • Or you can transplant into the ground if you are in an area free of frost or freezes.

Tips

  • Cuttings should generally consist of the current or past season’s growth. Avoid taking green cuttings, they are harder to root and avoid material with flower buds if possible. Remove any flowers and flower buds when preparing cuttings so the cutting’s energy can be used in producing new roots rather than flowers. Take cuttings from healthy, disease-free plants, preferably from the upper part of the plant. Select cuttings from a healthy plumeria.
  • If your cutting looks wrinkled, soak overnight in warm water. Add a little SuperThrive (follow mix instructions) or Hydrogen Peroxide (use 1/2 cup to 1 gal).
  • If you cutting starts to get soft and turns black on the cut end, you should cut until you see all white.
  • If your cutting is already hard on the cut end, you do not need to recut. 
  • DO NOT use a bloom booster fertilizer (high center number), you want the cutting’s energy going towards creating roots, not to producing blooms.
  • Newly rooted cuttings should not be transplanted directly into the landscape. Instead, transplant them into containers. Growing them to a larger size before transplanting to a permanent location will increase the chances for survival.
  • Rooting time varies with the type of cutting (tip or mid cutting), the cultivar being rooted, and environmental conditions. Reds typically require more time than white or yellow plants. Early Spring to Mid Summer is a good time to root plumeria. Once rooted, they will have three or four normal sized leaves and may be transferred to a larger pot and fertilized. Winter is not a good time due to plumeria going dormant.
  • The rooting medium should be sterile, low in fertility, and well-drained to provide sufficient aeration. It should also retain enough moisture so that watering does not have to be done too frequently. Materials commonly used is a mixture of one part peat and one part perlite (by volume). Vermiculite by itself is not recommended, because it compacts and tends to hold too much moisture. Media should be watered while being used.
  • Place the cutting out of direct sun in a dry location. Allow the cut end of the cutting to dry until it is dry and firm. This takes 5 to 15 days depending on the weather. If the cut end becomes soft or rot starts, you will need to cut until all the dark coloration is gone. You can dip in a rooting hormone after a new cut is made. Before planting be sure the cutting is firm and looks healthy. If the cutting looks dehydrated or wrinkled you can soak for 4-6 hours in water. A bit of SuperThrive can be beneficial.
  • Treating cuttings with root-promoting compounds, (while the latex is still wet) can be a valuable tool in stimulating rooting of some plumeria that might otherwise be difficult to root. Prevent possible contamination of the entire supply of rooting hormone by putting some in a separate container before treating cuttings. Any material that remains after treatment should be discarded and not returned to the original container. Be sure to tap the cuttings to remove excess hormone when using a powder formulation.
  • While terminal parts of the stem are best, a long shoot can be divided into several cuttings. Depending on the Cultivar cuttings will generally range from 10 to 18 inches long. Use a sharp, thin-bladed pocket knife or sharp pruning shears. If necessary, dip the cutting tool in rubbing alcohol or a mixture of 1 part bleach to 9 parts water to prevent transmitting diseases from infected plant parts to healthy ones. 

Supplies You’ll Need

  • Clean and sharp shears or knife
  • Isopropyl Alcohol, for cleaning tools
  • Hydrogen Peroxide, Why Hydrogen Peroxide or SuperThrive
  • 1 gal or 2 gal nursery pots or Rooting Tubes
  • Rooting Hormone powder. I suggest Hormodin 2 Rooting Compound for wood and semi-woody plants
  • Potting soil
  • Coarse Perlite
  • Bamboo stakes
  • Vitazyme, Why Vitazyme?
  • Carl Pool’s Root Activator, Why Carl Pool’s Root Activator?
  • A good balanced slow release fertilizer to feed the roots. I suggest Excalibur 11-11-13, Why Excalibur 11-11-13?
  • A good balanced fertilizer for Foliar feeding. I suggest BioBlast 7-7-7, Why Bioblast 7-7-7?

Rooting Plumeria cuttings in water

Although people have been rooting plumeria in water with some success, this is not the best way to root your plumeria. The roots that form in water are not the same as roots that form in soil. They are fragile and brittle, adapted to growing in water as opposed to soil. Once you transfer a water-rooted plant to soil, many of these roots will break off immediately and the rest will shrivel and die up as they’re replaced by the more robust roots adapted to soil.

If you do water root, Just remember once a plant is in water, it will develop “water roots” and feed itself with water nutrients. When you put it in soil, (after all that is where they grow naturally) the first week, keep it in a cup, so the soil is really wet, puddle like, then gradually as the weeks go by, decrease the water and just let the soil be moist.

That way, it eventually will send out new soil roots, and can feed itself accordingly.

Related Images:

How to Grow Plumeria Cuttings Guide

How To Germinate and Care for Plumeria Seeds and Seedlings

Plumeria Seeds

When germinating plumeria seeds at home or in a greenhouse, the first thing to remember is plumeria seeds may be started indoors, but should be transplanted and moved to a location that provides plenty of light as soon as it has 3 or 4 real leaves. Leaving a seedling in small containers may result in disrupted growth, which can lead to unfavorable results. However, starting plumeria indoors is a great way to get an early jump on the outdoor growing season. When choosing a medium in which to germinate plumeria seeds, look for one that says something along the lines of, “seed starting mix.” This type of growing medium will likely have a moderate elemental fertilizer charge, which will benefit the newly sprouted seedlings. Seeds can be germinated in many different styles of trays and containers, so choose the type that best fits your space needs. If starting just a few seeds, a simple, flat starting tray or small individual containers will work great. When planting many seeds at once, it may be wise to use trays that are divided into separate growing chambers. This will cut down on the amount of transplanting needed as the plants grow. Remember, all a plumeria seed needs to germinate is warm temperatures and moisture. Some growers do use heat pads underneath the starting trays. Most plumeria seeds will germinate at temperatures between 65-90 degrees Fahrenheit and the added warmth in the growing medium can speed up the germination process. Using supplemental lighting, like a T5 fluorescent bulb, can also help provide extra heat. Though seeds may not need light in order to germinate, the seedling will need light, so having a light source ready is a good idea. I would use caution when starting seeds in a bright window sill because direct sunlight through glass can alter the intensity and the seedlings may stretch and become ‘leggy.’ (There are many good plumeria seed germination methods, I suggest you research each one and use the one or ones that fit you situation.)

When preparing to germinate seeds indoors it is a good idea to soak the seeds overnight or at least 4 hours in a warm place. Also moistening the growing medium before planting any seeds. This will help to ensure that the medium is not over saturated or water logged and that the moisture is spread evenly throughout. Using a tray, spread the seeds so they have about an inch between each, this will help minimize the root damage when transplanting.  I have found using plugs is much easier to handle and preserves the roots when transplanting. There are many good planting methods and you should examine each to see which fits your situation and may help result in higher germination rates. If planting is occurring in a flat starting tray, space seeds at least an inch apart, either in rows or in a grid pattern and cover lightly with 1/4″ of growing medium (remember oxygen is important during germination, so don’t pack the medium down to much). Then, spray the entire tray lightly with a hand held mister. The soil should be kept moist not wet long enough for the seeds to germinate, it may need to be sprayed with the mister occasionally to maintain even distribution of moisture. Some growers use starting trays that have plastic, hood-type lids. This will keep the humidity around the seeds at higher than average room levels and may help increase the chance of successful germination. Be sure to check the seeds daily to maintain an optimal environment.

Environmental Considerations

As the plumeria seedlings begin to pop up through the soil, there are a few environmental aspects that should be given proper attention right away: light intensity, humidity, and air flow. Remember the seeds of different cultivars may germinate in different lengths of time. Usually plumeria seeds will germinate in 5-10 days, but I have seen it take up to 30 days if conditions aren’t right. Plumeria seeds can sprout in total darkness, but, once the seedling breaches the soil, a sufficient light source is imperative. Those first “true leafs” will need a light source to perform photosynthesis and create carbohydrates, which will help sustain both normal plant growth and, most importantly, root growth. Without proper lighting, the early vegetative growth of a plant can be negatively affected and could cause long lasting problems.

Humidity can be helpful during the initial germination process but, as the seedlings begin to grow, high levels of humidity can spell disaster. As internal process burn up the seedlings energy sources, the plants will need to release oxygen as a gas through their stomata (a process called transpiration). As the oxygen leaves the plant, water and elemental nutrients are pulled up through the roots. In a humid environment, the stomata will remain closed and the roots will not take in water. If the growing medium is wet without proper aeration, the water will have nowhere to go and the roots will likely suffocate and die.

Air flow and humidity almost go hand in hand. A nice flow of air through the plants canopy will encourage the flow of carbon dioxide to the leaves and, subsequently, oxygen away from them. This is not just true for seedlings, but for plants in all stages of growth. A small fan on medium or low can help keep humidity levels low and the heat from any supplemental lighting to a minimum. Be sure to keep the rooting medium moist, but not too wet. Seedlings need water and going to long without can result in serious damage. However, if the medium remains too wet for too long it may impair root growth. As the seedlings grow, they will eventually exhaust any nutrient charge that the growing medium had to offer, so light fertilization may be needed while waiting to transplant into a different container.

As the seedlings grow, with proper care and attention, they inch closer and closer to fulfilling their own unique destiny. Every plumeria seeds has it’s own DNA structure and will not be exactly like any other. As we stand by, eagerly awaiting the flowers of our labor, it is important to remember that every plumeria we grow has entered into this life as a small, almost insignificant looking thing, that so many refer to as simply, just a seed.

Related Images:

Plumeria Care Regimen

I would like to share our vision of the best possible regiment, SO FAR, for our plumeria growing in South Florida. I hope the following helps you with your goals and plans for 2017.

The goal is to know what, when and why, so you can improve every year by giving your plumeria the best growing environment. Making a plan and documenting all adjustments will allow you to look back and hopefully determine where you can make improves.

Before the season starts we always examine what we did last year and try and determine how we can improve our methods and products. The following is an outline of what we’re planning for our 2017 Care Regiment at Florida Colors. Please keep in mind your growing environment and how it differs from South Florida Zone 10B. The start of your plan should correspond to when you are past the threat of a frost or freeze. You should also make a plan to protect you plumeria from cold weather, just in case you get caught.

How To Foliar Feed Plumeria

Foliar Feeding

When Dr. Tuckey and his colleagues discovered that plant nutrients could be absorbed through a different part of the plant, besides just the roots, they in turn sparked new testing, new practices and a new debate. Even now, 60 years later, the conversation continues on the effectiveness and benefits of foliar feeding.

The main point of absorption for elemental nutrients is through a plant’s roots. However, sometimes the nutrients can become “locked up” with other elements in the soil, rendering them unusable by the plants. There are many factors that can contribute to nutrients becoming immobile in the soil. If the fertilizer solution you are using is imbalanced or if its pH is too high or too low, the plant may not absorb the nutrients. Poorly managed soils, damaged root-zones, excessive watering: all of these situations can lead to lowered rates of absorption of vital plant nutrients. When a nutrient doesn’t seem to be working effectively through soil applications, using the foliar feeding method is a possible solution.

The leaves, and sometimes even the stems, of many plants are equipped with tiny, pore-like apparatuses called stomata. The word stomata stems from the Greek word ‘stoma,’ meaning mouth. That is essentially how they work. Regulated by task-specific cells, appropriately referred to as “guard cells,” a plant’s stomata will open and close at certain parts of the day. Stomata are essential for two main reasons. The first is to allow oxygen and water vapor to leave the plant (transpiration), which, in turn, cools the plant down and allows for more water and nutrients to flow from the roots to the leaf cells (translocation). The other is to provide a point of entry for carbon dioxide, from the air, to come into the leave and make photosynthesis possible. Stomata can also act as a passage way for getting liquid plant nutrients into a plant. But, as is true with many aspects of life, timing is everything.

The opening and closing of stomata is directly affected by certain environmental conditions. As far as I can tell this is not an exact science yet, but some basic principles seem to be regarded as true. Stomata are generally open during periods of high light intensity. A reason for this could be that the high level of light is causing a high level of photosynthesis and the stomata are open to allow more carbon dioxide in, a fuel for the photosynthesis process. Stomata also open during times of high humidity, when water is plentiful and plants don’t need to worry about conserving. However, stomata remain closed when conditions are exceedingly hot, above 80° Fahrenheit, or very dry. In these conditions, a plant will keep its stomata closed in order to conserve any available water. If you plan on foliar feeding in the hot summer months, it is recommended to feed in the morning or early evening. At these times, the sun is out, but the weather is still relatively cool. Understanding when the window of opportunity is for open stomata to occur is only one part of the picture. The next part is figuring out how to get the nutrients in.

Successful foliar feeding is not as simple as just spraying the liquid on the leaves; it is a process that involves careful technique and a little bit of grace. The following is a small list of tips I’ve compiled to help you along the way.

  • Avoid foliar feeding when temperatures are above 80° Fahrenheit. In the summer, it’s best to spray either in the morning or early evening, when temperatures are lower.
  • If possible, foliar feed when the weather is humid.
  • Check the pH of your nutrient solution before spraying. The ideal pH is right around 7.0, which is referred to as a neutral pH.
  • Mix your solution at a more diluted rate than if you were root feeding. If the directions call for 1 oz. of fertilizer per gallon of water for regular feeding, use 1 tsp per gallon of water when foliar feeding. The smaller the particles are, the more likely they are to enter into the stomata.
  • When spraying the solution, use a sprayer that creates the finest mist possible. This will ensure a better and more even spread of the solution on the leaf.
  • Use a wetting agent or surfactant. Water has a high surface tension rate, causing it to bead up when sprayed. Adding a wetting agent will lower the water’s surface tension, allowing it to thin and spread out.
  • Spray both the tops and bottoms of the leaf, until they are completely covered and excess solution runs off. On most plants, the stomata are on the underside of a leaf, but, at times, they reside on the top. So, just in case, spray both sides.

Possibilities & Realities

A trend that has been occurring in the liquid fertilizer industry for some time now is to market foliar feeding as a simple fix for what may be a major problem. Many companies include language like, “maximizes plant health” or “increases yields” in their literature regarding foliar feeding. I remember reading an advertisement once that said, in so many words, that foliar feeding is effectively the best way to battle bad soils. At that point, I took a step back and thought to myself, is it really?

My feeling is that “bad soils” need to be carefully amended in order to obtain maximum plant growth. However, it is true that foliar feeding can achieve much higher nutrient absorption percentages than root feeding. But it is also true that nutrients absorbed through the stomata do not travel throughout the plant as extensively as nutrients absorbed through the roots do. Also, it is impossible to get significantly large amounts of nutrients through the stomata. Essential elements such as nitrogen (N) and phosphorus (P) are needed by plants in high quantity levels, which are only achievable through root entry. Minor elements, such as iron (Fe) and magnesium (Mg), are needed in smaller amounts that may be obtained through foliar feeding.

If your plant is showing signs of iron deficiency, cut a leaf of the plant and dip half of it in the nutrient solution you plan on using. If, after a few hours, the symptoms begin to subside, go ahead and use the solution on the whole plant. Another element that can become immobile in the soil and may be of benefit in foliar feeding is calcium (Ca). Using calcium in a foliar treatment can help battle blossom end rot in tomatoes and peppers. Foliar feeding can be an effective way of supplying a plant with micronutrients and as a short-term solution to many different nutrient deficiencies. However, if you are experiencing the same nutrient deficiencies on a consistent basis, foliar feeding may not be the answer. Foliar feeding is usually more of a temporary fix, instead of a solution to a problem. This fix can be labor intensive and, at times, can become rather expensive, especially when used on a large scale. I’ve always believed that healthy plants come from healthy soils. Properly amending the soil in your garden should be your first step. Perhaps get your soil tested to see what it is lacking or what there is too much of. If minor nutrient issues arise along the way or if you just want to give your plants a little boost, foliar feeding, when done correctly, can be an effective addition to your gardening repertoire.

Related Images:

Powdery Mildew Chemical Controls

Chemical Controls for Powdery Mildew

Some of our past posts have looked at cultural and biological controls for powdery mildew. These, along with Greencure, are all typically approved for use in certified organic agriculture.

Now, it’s time to talk dirty. So, get out your PPE (personal protective equipment), take a deep breath, and prepare to kill some bacteria and fungi…

Synthetic chemical fungi killers come last in this series because, ideally, they are a last resort. While undeniably useful components in an integrated disease management plan, they should not be relied upon as a substitute for good gardening practices.Powdery Mildew of on a leaf of the tree

You may be familiar with foggers or “bug bombs” for pests like spider mites. They also exist for fungal diseases. Fungaflor TR‘s active ingredient is Imazalil. TR stands for total release. Once you trigger the fogger, the entire contents of the canister are emptied. One small two ounce fogger treats up to 1,500 square feet (1,000 square feet for powdery mildew). As with other bombs, thoroughly read and follow all directions on the label. The fog is flammable so make sure there aren’t any open combustion sources, like a pilot light. Once the treatment is over, ensure ventilation has completely removed the product from the space prior to reentry. We recommend airing out your grow space for a minimum of 24 hours to protect you and your pets from the harmful fumes.

Fungi bombs work very well as a preventative measure when preparing a new garden or to treat a space that previously contained pathogenic spores. Foggers provide excellent coverage over a large area and won’t leave residue behind, as burning sulfur tends to do.

Use with Caution

While Fungiflor can be used in a garden while plants are in it,  be careful. Do not trigger a bomb too close to your plants or they may be cause damage. In the Keys to Success listed by the maker of the product, it says to “clear out a three-foot area around the canister to prep for application”. Remember, one small can is intended to treat 1,000-1,500 square feet which is larger than many indoor gardens. If used in too small of a space, the increased concentration could also cause damage to your plants.

Eagle 20EW  is effective and, therefore, popular with many gardeners. The active ingredient is Myclobutanil. Eagle 20EW acts as a systemic with a residual presence in the plant. For this reason, treating a plant once or twice in its vegetative stage is often sufficient enough to successfully suppress powdery mildew. This is also the reason to avoid treating plants with it during the latter stages of growth.

Eagle 20EW can be used as a preventative treatment when introducing new plants to your garden from outside gardens. It can also be an effective knockdown treatment when other options have failed to break the pathogenic cycle. That being said, it should not be overused. Science has proved that overuse of fungicides, like Eagle 20EW, can result in some fungi becoming resistant to them. For this reason, the product label recommends alternating it with other products after two consecutive uses.

Do Your Homework & Use Caution

Carefully read the label/instructions prior to using the product. Since you shouldn’t require too many applications for the life-cycle of a plant, make them count by combining Eagle 20EW with a surfactant (like Coco Wet or Humboldt Sticky) to maximize plant coverage and keep it in place. If plant size permits, consider mixing enough solution to dunk the entire plant in order to guarantee complete coverage.

Related Images:

About Plumeria

Plumeria / Frangipani

Nothing evokes that tropical feeling quite like the Plumeria. Their sweet scent and sheer beauty make them universally loved and the blooms look sensational on the tree and as a cut flower. Pick up some freshly fallen blooms and float them in a bath or bowl of water and it’s easy to feel you’re relaxing in a fabulous tropical day spa!

Most familiar in their white and yellow form, they also come in loads of tropical and sunset colors, becoming more colorful the closer to the equator you go. Plumeria are also tough plants that can survive neglect, heat and drought and still fill the garden with a wonderful perfume. What more could you ask for in a tree?

Description & Varieties

This section provides a description of the plants available, and details the varieties most commonly kept in the home garden.

  • Plumeria (/plˈmɛriə/; common name plumeria or frangipani) is a genus of flowering plants in the dogbane family, Apocynaceae. It contains primarily deciduous shrubs and small trees. The flowers are native to Central America, Mexico, the Caribbean, and South America as far south as Brazil but can be grown in tropical and sub-tropical regions.
  • Plumeria alba is a species of the genus Plumeria (Apocynaceae). This 2-8 m evergreen shrub has narrow elongated leaves, large and strongly perfumed white flowers with a yellow center. Native to Central America and the Caribbean, it is now common and naturalized in southern and southeastern Asia.
  • Plumeria clusioides is a species of the genus Plumeria in the family Apocynaceae. It is endemic to the Island of Cuba. Some authors consider P. clusioides to be the same species as P. obtusa, but we follow the lead of the World Checklist produced by Kew Royal Gardens in London in accepting it as a distinct species.
  • Plumeria obtusa, the Singapore graveyard flower, is a species of the genus Plumeria (Apocynaceae). It is native to the West Indies including Bahamas; southern Mexico, Belize, Guatemala, and Florida. but widely cultivated for its ornamental and fragrant flowers around the world, where suitably warm climate exists. It is reportedly naturalized in China.
  • Plumeria pudica is a species of the genus Plumeria (Apocynaceae), native to Panama, Colombia and Venezuela. This profuse bloomer has unusual spoon-shaped leaves, and its flowers are white with a yellow center.

    There is a variegated leaved Plumeria pudica commonly called Golden Arrow or Gilded Spoon, also a pink flowering hybrid produced in Thailand called Sri Supakorn or Pink pudica.

  • Plumeria rubra is a deciduous plant species belonging to the genus Plumeria. Originally native to Mexico, Central America, Colombia and Venezuela, it has been widely cultivated in subtropical and tropical climates worldwide and is a popular garden and park plant, as well as being used in temples and cemeteries. It grows as a spreading tree to 7–8 m (23–26 ft) high and wide, and is flushed with fragrant flowers of shades of pink, white and yellow over the summer and autumn. Its common names include frangipani, red paucipanred-jasminered frangipani, common frangipani, temple tree, or simply plumeria.


History, Facts & Legends

Did you know that plumeria will only burn in extreme heat (over 500 degrees)? In this section, learn a little about the history of plumeria and some little known facts. We also share some myths and legends about plumeria from around the world.

Plumeria / Frangipani Names

How did the plumeria get it’s name? And the frangipani? In this section, we give you the lowdown, not just on how they got their original names, but also what plumeria are called around the world.

Description

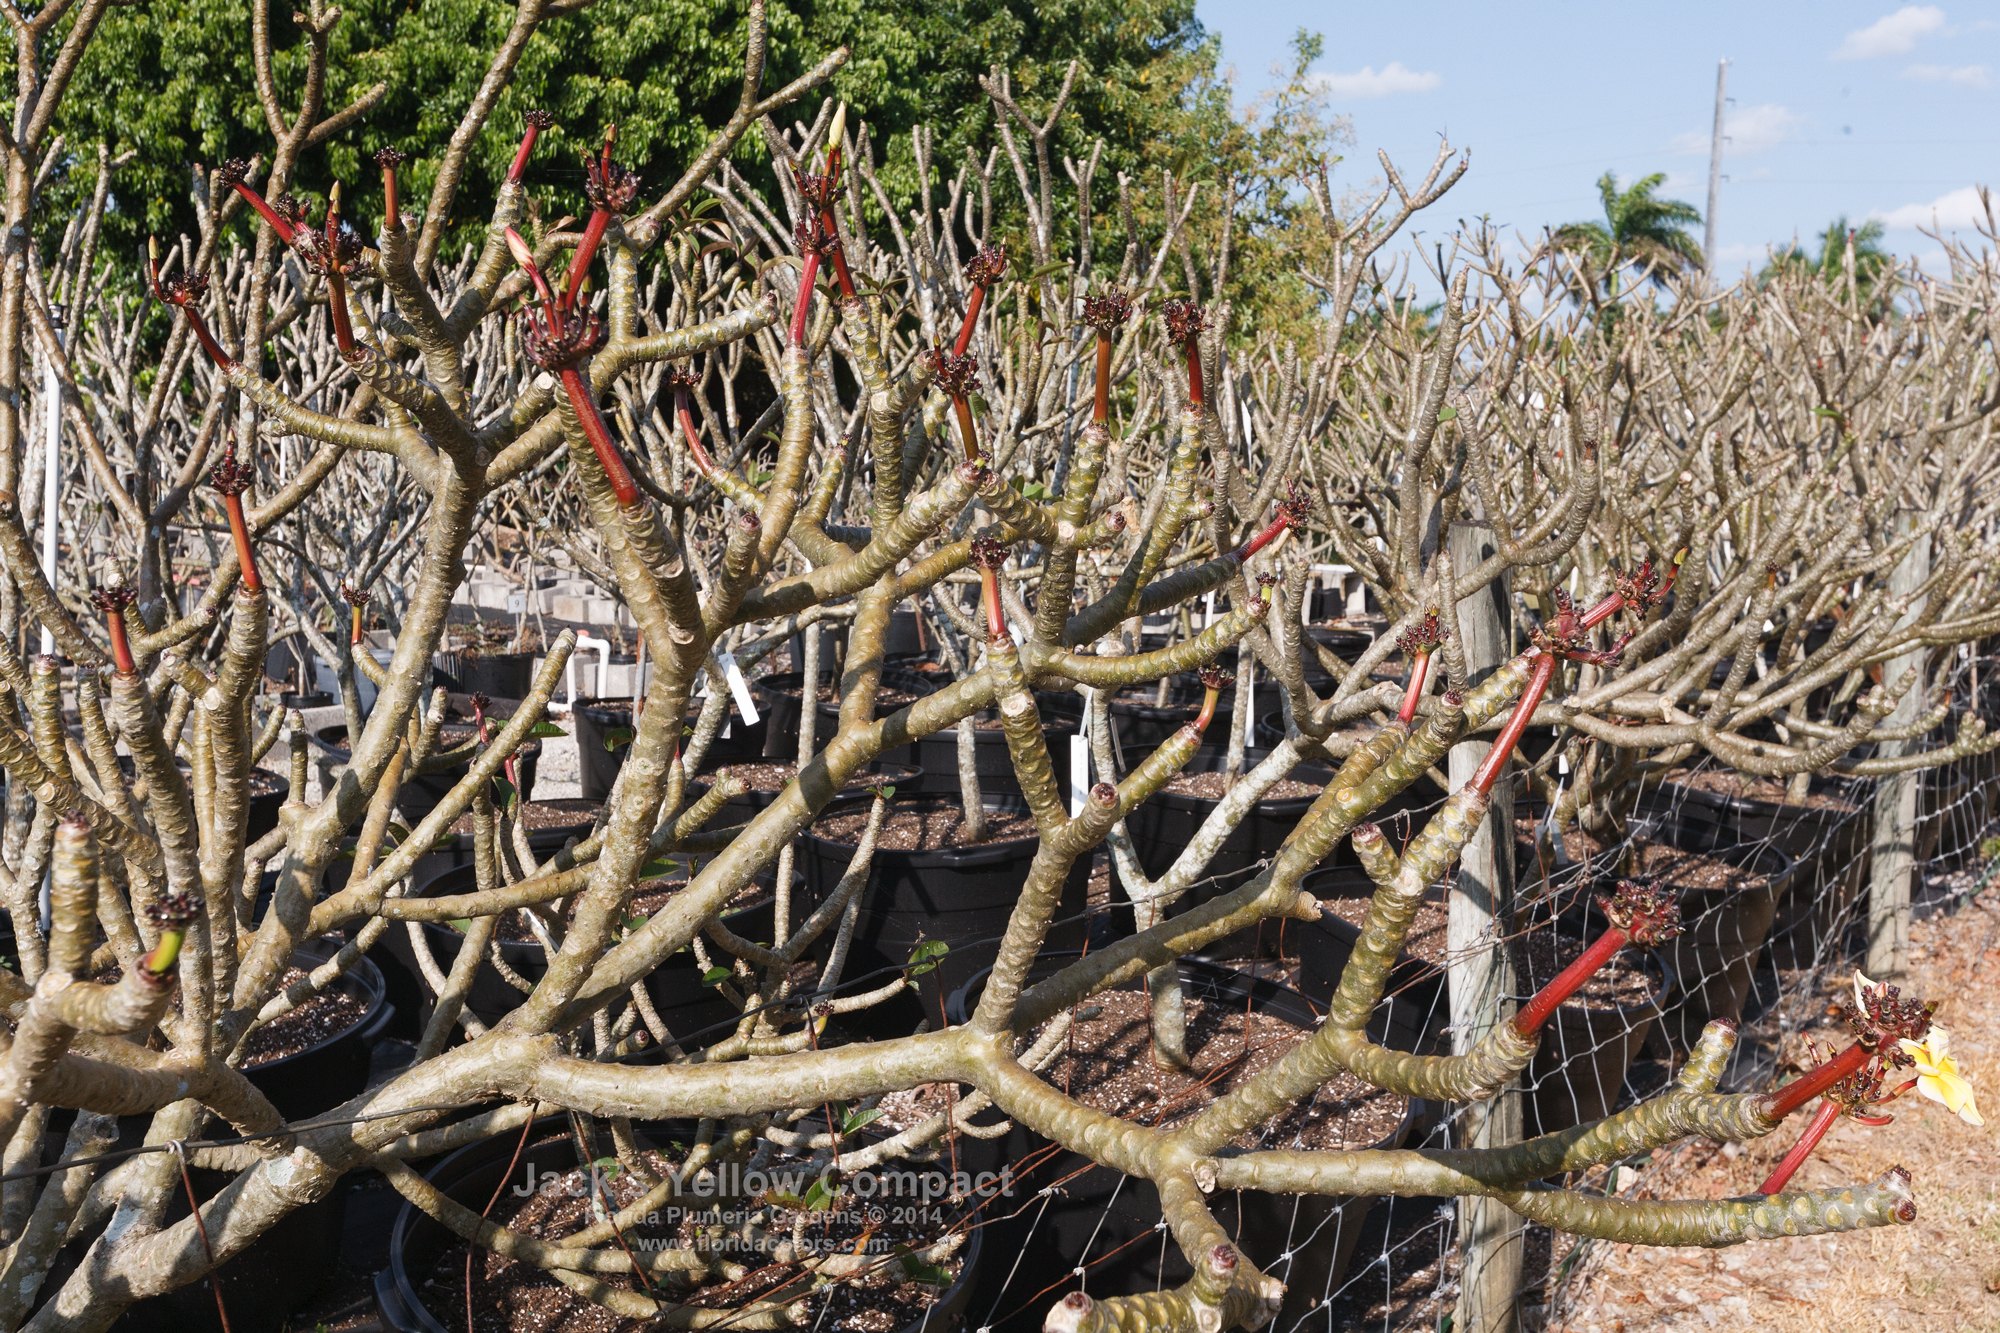
Plumeria are relatively small trees typically growing only to about 12-15 feet in height, but what they lack in height they make up in width often becoming as wide as they are tall. They have a well-behaved root system which makes them great for the home garden and for growing in pots. Plumeria are also great survivors coping with drought, heat, neglect and insect and pest attack. They are also deciduous allowing maximum winter sun while providing shade in summer.

With its gnarled branches, long leaves and distinctive flowers, the plumeria is easily one of the most common and identifiable trees. The bark is grey/green and scaly in appearance. The scaling is formed when leaves drop in winter leaving small semi-circular marks on the bark. The branches have a swollen appearance and the leaves, dark green on the top and a lighter shade of green underneath, cluster at the tips of branches.  A cut made on any part of the tree will exude a milky, sticky sap that is poisonous to both humans and animals.

Plumeria flowers appear in clusters, also at the end of the branches, and are distinctively scented. The petals are waxy with the center of the flower a different color to the rest. For example the most common plumeria has white flowers with a yellow center. There are many varieties ranging from deep crimson to orange , yellow and white (and every shade in between). Unlike some flowering trees which bloom for a few days or weeks, plumeria go on flowering. Flowers appear from May to October in the US and December to April in Australia, and even longer in warmer climates.

Varieties

Plumeria (common name Frangipani) is a small genus of 7-8 species native to tropical and subtropical Americas. The genus consists of mainly deciduous shrubs and trees. From Mexico and Central America, Plumeria has spread to all tropical areas of the world, especially Hawaii, where it grows so abundantly that many people think that it is indigenous there.

Plumeria is related to the Oleander (Nerium oleander) and both possess poisonous, milky sap, rather similar to that of Euphorbia. Each of the separate species of Plumeria bears differently shaped leaves and their form and growth habits are also distinct.

Plumeria Obtusa is a mainly evergreen tree (deciduous in dry seasons) with spreading branches and a rounded dome. Although its common name is "Singapore", it is originally from Colombia. Height to 24′ and spread to 12′. Leaves are pointed and oval up to 18" long. Tubular fragrant flowers occur in summer – autumn.

Plumeria Rubra (and variation Plumeria Acutifolia) also known as the Common Frangipani or Red Frangipani, is native to Mexico, Central America, and Venezuela. It is a deciduous, spreading, sparsely branched tree or shrub with a height to 15′ and spread to 12′ and more. Produces fragrant flowers with 5 spreading petals, ranging from yellow to pink depending on form or cultivar, in summer to autumn. Leaves are lance shaped to oval, and 9" to 18" long.

History

It is generally thought that plumeria are native to South & Central America although some reports claim they are native to the Caribbean and were taken to the Americas by Spanish priests.

According to Steven Prowse, of Sacred Garden Plumeria’s, frangipani arrived in Australia from South America via the Polynesian peoples who inter bred with the Melanesian peoples & established villages in the Melanesian region in what is now New Guinea. From there, frangipani came to Australia via 2 routes.

The first was via the Torres Strait Islands which are between Australia and New Guinea and are less than a day’s paddle in a dugout canoe from either. The Torres Strait Islanders traded & interbred with both the New Guinea & Australian aboriginal peoples and brought the frangipani to both the Torres Straits and Australia. The islanders consider the frangipani a sacred plant.

The second & most important wave of frangipani introduction into Australia happened in the late 1800’s through to the 1920’s through Polynesian missionaries and, later, slaves. The missions were established in remote northern tropical regions of Australia by the Polynesian-based church missions who brought with them Polynesian & Melanesian Christians, coconuts & frangipani. Most missions failed to survive long term in these disease, snake and crocodile-infested and cyclone-prone areas, and were abandoned. They eventually vanished into the tropical jungle with only the drought-hardy frangipani surviving. Most of the more beautiful varieties of frangipani found in Australia were brought directly from Polynesia & Melanesia by these missionaries.

Later, gold mining and a pioneering sugar cane industry was established in parts of the region and the land had to be cleared by hand. The work was too dangerous, hot & difficult for the European settlers, who turned to the enslavement of captured Polynesians as forced laborers to establish their sugar cane plantations.  In time laws were changed and the Polynesian slaves were set free.

Many stayed and others returned to their Polynesian homelands bringing back family members and many varieties of their sacred frangipani.

Today, frangipani are found in most parts of Australia as they will tolerate a wide range of conditions and are probably one of the easiest plants to grow from a cutting.

Little-Known Facts about the Plumeria

  • Many Hawaiian leis are made from Plumeria flowers.
  • The colorful caterpillar of Pseudosphinx tetrio feeds only on Plumeria rubra.
  • Cole Porter’s song "A Stroll on the Plaza Sant’ Ana" (from the musical Panama Hattie, 1940) mentions Plumeria.
  • Plumeria are good hosts for dendrobium orchids.
  • The plumeria is the national tree of Laos, where it is called dok jampa. It is regarded as a sacred tree in Laos and every Buddhist temple in that country has them planted in their courtyards. Many of the trees are hundreds of years old and are spectacular, huge, gnarled giants.
  • The plumeria is the flower of the city of Palermo in Sicily, Italy.
  • The plumeria is the national flower of Nicaragua and it features on some of their bank notes.
  • Plumeria won’t burn except in extreme (over 500 degrees) temperatures.
  • In Caribbean cultures the leaves are used as poultices (a healing wrap) for bruises and ulcers and the latex is used as a liniment for rheumatism.
  • According to Cunningham’s Encyclopedia of Magical Herbs (by Scott Cunningham; Llewellyn Publications, 1984) the plumeria (frangipani) is associated with the feminine, ruled by Venus, its element is water, its deity is Buddha, its power is love and its magical uses are in love spells.
  • The plumeria is also associated with love in feng shui.
  • In modern Polynesian culture, the plumeria can be worn by women to indicate their relationship status – over the right ear if seeking a relationship, and over the left if taken.
  • In India the plumeria is a symbol of immortality because of its ability to produce leaves and flowers even after it has been lifted out of the soil. It is often planted near temples and graveyards, where the fresh flowers fall daily upon the tombs.
  • In Vietnam the plumeria is used for its healing qualities: the bark, mashed in alcohol, prevents skin inflammation, it is also used to treat indigestion and high blood pressure, while the roots have purgative effects on animals and the milk-like sap serves as a balm for skin diseases. The white flowers are used in traditional medicine to cure high blood pressure, haemophilia, cough, dysentery and fever.

Plumeria Myths and Legends

  • There is a theory that Catholic missionary priests spread plumeria around the world as they traveled. This may explain why the plumeria is so popular and common in the Philippines and Thailand but very rare in China and Vietnam. Thailand and the Philippines welcomed the Christian missionaries while, in China and Vietnam, they were persecuted until around the 1850s.
  • Plumeria trees were once considered taboo in Thai homes because of superstitious associations with the plant’s Thai name, lantom, which is similar toratom, the Thai word for sorrow. As a result, plumeria were thought to bring unhappiness. Today, however, the blossoms are presented as fragrant offerings to Buddha and Thai people wear them on special festival days like Songkran (Thai New Year).
  • According to Vietnamese myth, ghosts live in trees with white and fragrant flowers including the plumeria. In Vietnam and China the color white is associated with death and funerals.
  • In Hindu culture, the flower means loyalty. Hindu women put a flower in their hair on their wedding days to show their loyalty to their husbands.
  • It’s believed the Aztecs used a decoration of plumeria flowers and other plant materials mixed with certain internal organs of predatory animals (with a reputation for cunning, strength and bravery) as a powerful potion against fear, lethargy and fainthearted.
  • "Warming" oils — such as those from Plumeria, sandalwood, lotus flower, frankincense, cinnamon and basil — are said to have a calming influence on those suffering from fear, anxiety, insomnia or tremors, according to the principles of Ayurveda, a 5,000-year-old Indian holistic science that seeks to balance mind, body and spirit.
  • A popular legend among sailors shipping overseas from Hawaii during WWII was to toss a lei into the waters as the ship passed Diamond Head. If the lei floated ashore, the sailor would return. If it floated toward the ship, he wouldn’t be coming back.
  • In the language of flowers, Plumeria are said to stand for love long in absence, as for a sailor long at sea.
  • Plumeria are very rare in China, and even more precious than orchids. So, when a person gives plumeria flowers to a sweetheart, it is the closest thing to saying you’re special, I love you in a culture where expression of personal feelings is frowned upon.
  • According to Mexican (Lakandon) myth the gods were born from Plumeria flowers.
  • In Malay folklore the scent of the plumeria is associated with a vampire, the pontianak.

How the Plumeria and Frangipani Got Their Names

The name "Plumeria" is attributed to Charles Plumier, a 17th Century French botanist who described several tropical species, although according to author Peter Loewer, Plumier was not the first to describe Plumeria. That honor goes to Francisco de Mendoza, a Spanish priest who did so in 1522.

The name, frangipani, comes from the Italian nobleman, Marquis Frangipani, who created a perfume used to scent gloves in the 16th century. When the frangipani flower was discovered its natural perfume reminded people of the scented gloves, and so the flower was called frangipani. Another version has it that the name, frangipani, is from the French frangipanier which is a type of coagulated milk that Plumeria milk resembles.

Other Plants Which Go Under the Name Plumeria

The Climbing Frangipani or Frangipani Vine is not a Plumeria, but Chonemorpha Fragans (although it belongs to the same family, Apocynaceae).

The Australian Native Frangipani is not a Plumeria either. Hymenosporum Flavum belongs to the family Pittosporaceae.

Plumeria Names Around the World

The botanic name is Plumeria. Around the world the plumeria (frangipani) is called:

  • The Aztec word is Cocaloxochite.
  • Tipanier in Tahiti.
  • Dok jampa  or Dok champa in Laos
  • Pomelia and Frangipane in Italy
  • Couleuvre, or Snake Tree in St.Barths Bois
  • Kemboja kuning in Malaysia
  • Pansal Mal in Sri Lanka
  • Jepun in Bali, Indonesia
  • Flor de Mayo in Yucatan, Puebla, El Salvador
  • Flor de la Cruz in Guatemala
  • Pumeli or Melia in Hawaii
  • Amapola in Venezuela
  • Kang Nai Xin in China
  • Phool in India
  • Hoa Su (Southern ), Hoa Dai (Northern) and Hoa Su Ma (ghost Plumeria) in Vietnam
  • Kalachuchi in the Philippines
  • Flor de Cebo in the Canary Islands
  • Sacuanjoche in Nicaragua (the name is derived from the word "xacuan" from a native language called náhuatl and means "precious yellow feather or flower".
  • Common names are Temple Tree or Pagoda Tree in India and the Far East, Graveyard Tree in the Caribbean Islands, Temple Flower in Sri Lanka, and May flower (for the time of flowering) in Nicaragua.

Related Images: